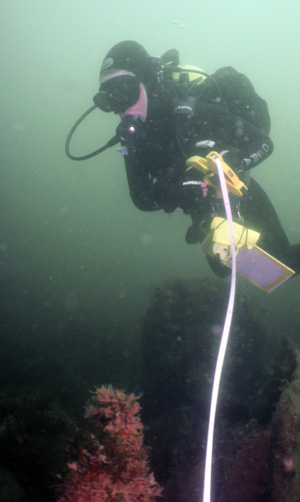
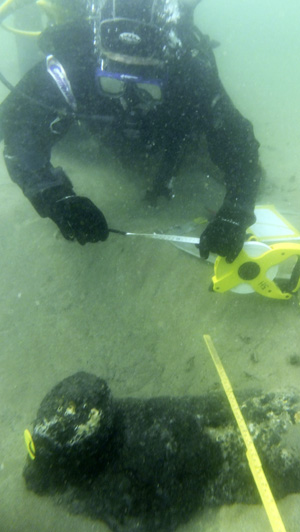
Techniques: Underwater and Foreshore Surveying
Version date: 16 October 2016

- 1. Underwater Surveying
- 2. Survey Methods
- 3. How to Install Survey Points
- 4. How to Make Survey Measurements
Introduction to Surveying
Surveying is just one part of the recording process, the results form the framework on which information recorded about a site can be precisely positioned. The aim is to re-create the site as a 2D plan or 3D model and an accurate representation is needed, not just a sketch, so accurate an survey is essential. The basic principle of surveying is to be able to work out the position of a point from some other point or points, positioning from the known features to the unknown ones, often described as 'working from the known to the unknown'.
To start a survey of a shipwreck, measure the distance between two points on the site then draw this to scale on a piece of paper, which becomes your site plan. By measuring the distance from these two points to other points on the site the other points can be drawn relative to the two initial points on your plan. You can draw up a set of points joined by distance measurements on your site plan, to scale, as they are seen on the seabed.
Four problems complicate this simple idea:
- Sites are three-dimensional so we need to deal with differences in height or depth
- Your measurements will have mistakes in them
- Your measurements are not perfect
- Site plans get complicated when there are lots of points and measurements
The simple survey described above works well enough for sites that are flat, as soon as there are any significant differences in depth then it stops working. We need to be able to account for the differences in depth.Expect to make mistakes in your measurements. Previous surveys have shown that between 5% and 15% of measurements made underwater are wrong so we need to add procedures to find these measurements.All measurements are not perfectly accurate, they are all plus or minus a bit where only the size of the 'bit' differs. As we will see later, this measurement error affects the accuracy with which we can position artefacts and ship's structure on our site.
Where we have lots of points to position on a site the number of points and measurements can get too large to deal with easily. To get around this problem we set up a network of points around the site from which we position artefacts and structure. The control point network is a cornerstone of surveying, it looks like yet more work but in fact makes surveying easier.

The Survey Procedure
All survey work follows a simple four-step procedure and each step is discussed in detail below:
Planning
The most important question to ask is - What are you trying to achieve? If you don’t know what you are trying to achieve, you will not know when you have finished. Much of this depends on whether you are doing a quick assessment survey or a detailed recording survey as the requirements for each are different, see Survey Types. Another factor is the type of site being recorded, see Site Types for more information abouth this aspect.
The actual amount of time the team will spend on site and underwater is usually very short. It is essential that any work is well planned before it is started so work on site is efficient, safe and problem-free. The level of detail and accuracy required help decide the survey and recording techniques that can be used and these should be specified in the research design. The equipment available and the experience of the team also limit the techniques that can be used but the overriding factor may be the amount of money available for the project.
Collecting Measurements
By the time you come to start recording the site the plan should have been explained to all involved. This is the point where teamwork and communication become very important. If the team are well briefed before work and de-briefed afterwards then the team leader can deal with problems as they are found.Any recording forms that have measurements on them should be well looked after. The forms are the primary record of your work and should be kept even after they have been processed. Keeping a notebook with day to day accounts, speculations and ideas about the site is often useful, the notes can be handy later on when the measurements are being processed.
To be efficient the team needs to be well trained and well practised. If any team member needs a refresher then the survey techniques to be used can be practised on dry land beforehand.
Processing Measurements
In the processing stage the measurements that have been collected are used to calculate the positions of the points or detail we are trying to record. Often this process is done while drawing up the site plan if the points are to be plotted by hand.
For some methods distance measurements are corrected for differences in depth. Depth measurements should be corrected for changes in the height of tide during recording. At this stage any mistakes need to be identified and repeat measurements requested.
Drawing Up
With sketches or measurements collected from your site you can start to create the site plan. The plan may be drawn by hand or drawn on a computer. Computer generated plans are more useful as printed copies can easily be made, they can be printed at different scales and the level of detail shown can vary as the work progresses.
If the site has not been recorded before then the sketches or assessment survey results can be turned into a site plan. In doing this you are likely to find that something has been missed and additional work is required.
If a recording survey is being done then the first step is to position the control points around the site on the site plan. Measurements may be needed from the control points to a couple of the main features on the site to align previous site plan with the control points. With the control in place the features can then be added to the plan as they are recorded and processed.
